Most lava lamps have come in 3 varieties of caps. 26mm Bottle caps, crimp caps, and screw on caps. You can compare what you have to this chart. This chart has most common caps, but there are a few out there that are unique to the lamp they came with and aren’t covered here.

Bottle Caps
Screw on Caps
3D Printing Replacement Caps
Crimp Caps
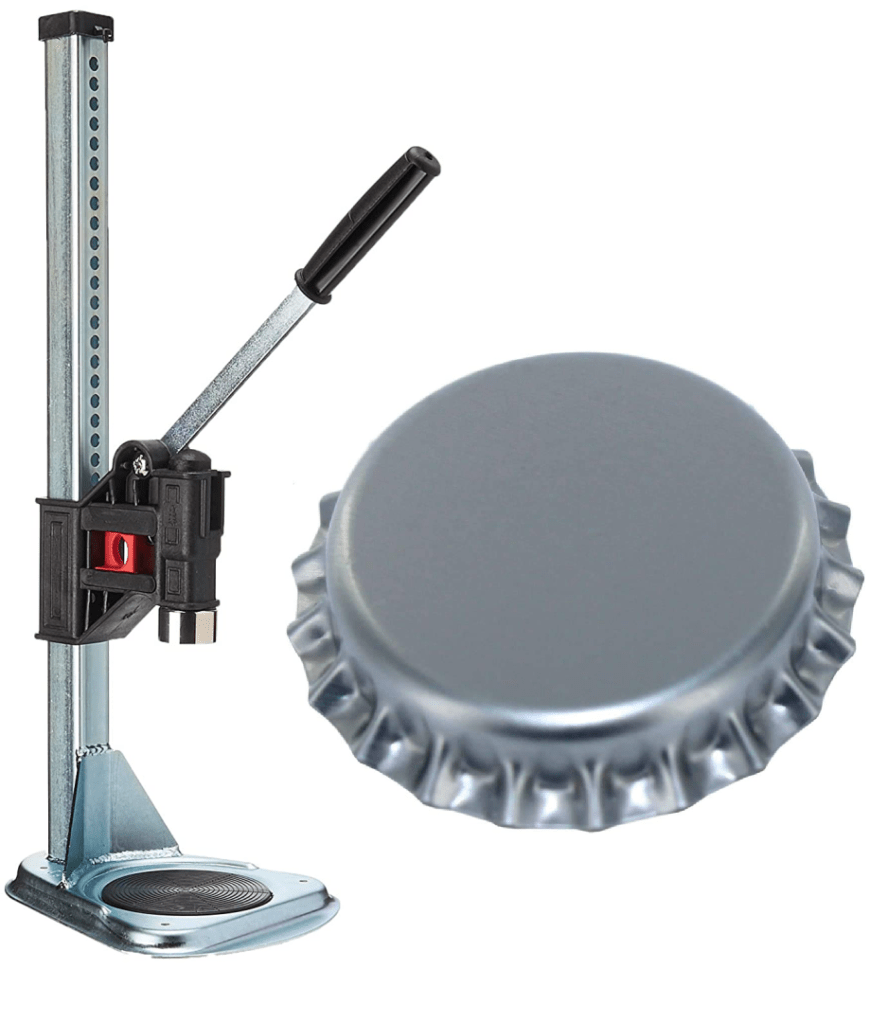
Bottle Caps
Bottle caps aren’t reusable because after they have been on a lamp for an extended period of time the plastic begins to harden and conform to the surface of the bottle.
They can easily be removed with a standard bottle cap remover, but if you want to keep the cap for whatever reason you can gently pry them off with a screw driver by moving along the circumference of cap and applying a small amount of pressure. That should eventually cause it to pop off.
Putting a new cap on without the right tools is pretty much impossible. There are 2 kinds of bottle capping tools available. The first is the hand held bottle capper. These will most likely not work for you because they require a lip on the bottle underneath the cap to grip on to. There are a few lava lamp bottles that do have these though so if you are lucky enough to be able to use it and have one on hands by all means go for it.

Every other lava lamp bottle that uses a bottle cap will require a bench capper. These press on the cap and do not require a lip. You will need 26mm bottle caps with an oxygen barrier. These are the same caps you will find on a beer bottle.
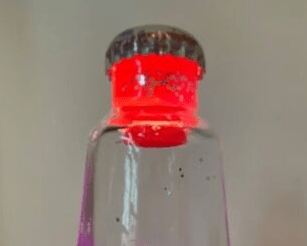
Sometimes it is necessary to replace caps if the seal is poor. This can happen with old age or if the crimping was not done right. If the cap can be spun freely the cap needs to be replaced. This is very common with glitter lamps as the chemicals inside of them degrade the rubber in the cap.
Late 1990’s and early 2000’s USA made glitter lamps have a plastic plug underneath the bottle cap. This can be removed by pulling on the sides until the vacuum is released.
It is almost impossible to remove these without destroying them. Fortunately these are easily available online. To find the replacement for these search online for “Caplugs 99191209 Plastic Cap for Threaded Connectors. RC-11, PE-LD”. These are normally used as caps for threaded connectors.
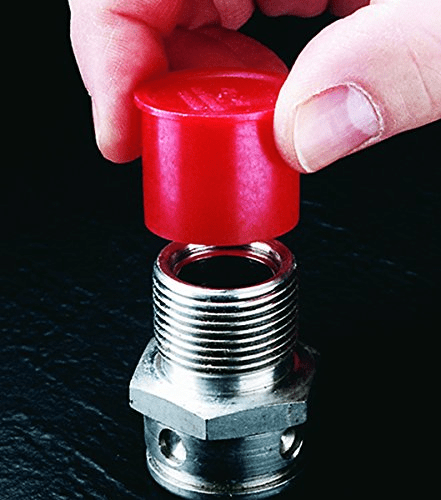
These make it difficult to get a good crimp with the bottle cap. Sometimes it requires multiple attempts before a solid seal is achieved with the bottle cap. This could probably be avoided by pushing the Caplug into the bottle some, but I haven’t found a better and more reliable way to do it yet.
Screw on Caps
Screw on caps are the easiest to work with. These are the original caps used on older lava lamps. They are found across all models before the mid 1980’s and are still used in the UK by Mathmos which originally used them.
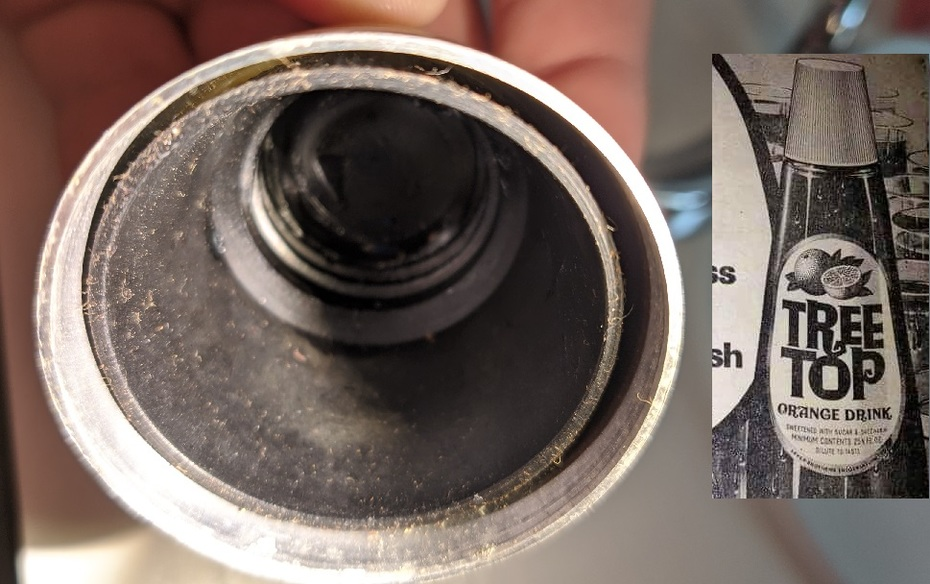
The smaller ones get their origins come from the Tree Top brand bottles. These bottles were purchased by Mathmos which at the time as known as Crestworth for their smaller Astrobaby line. They used a wider screw cap for their Astro bottles as well. When Lava Lite began producing their products in the states they used the same Tree Top bottles for their Enchantress line and you can see the evidence of this if you remove a cap and look inside.
In their current models they separated the screw on part of the cap from the decorative cap.

These can sometimes be difficult to remove because almost all of them were glued on. This glue can be softened with heat. You can either use a hair dryer or a heat gun. Just make sure to warm the cap gradually and use a rag or something when trying to remove them so you don’t burn yourself. Even the most stuck on cap can eventually be removed with some heat and pressure and sometimes a little bit of spray lubricant. Be patient though, you don’t want to break your cap.
3D Printing Replacement Caps
If you break your Century/Aristocrat cap there is an option to replace it. OozingGoo member Duane K 3D modeled a replacement screw up for 52oz lava lamps. The discussion for his work can be found here.
Backup link in case the original goes away. https://drive.google.com/file/d/183PtBlAAb_snAWe6j12pzSL0Uy7V3fag/view?usp=sharing
Companies like https://craftcloud3d.com/ can print it out for you. Make sure to select PETG for the plastic type and use 100% infill.
You will also need an o-ring for the printed cap. The dimensions for it is 1-1/2″x1-3/4″x1/8″ #81 and a model number typically associated with these is 02-1618P.
When printing these caps remember lava lamps reach temperatures up to 120F so made sure to use a plastic rated for well above that. Also print with the highest quality and resolution possible. The plastic o-ring needs to make an air tight seal against the plastic cap. If there are small grooves in the printing the o-ring will not form a seal. It is possible to add a small amount of silicone caulk between the o-ring and the cap, but it is best to try to avoid the need for that.
Some sanding, filling, and painting will be needed to bring the exterior finish of the cap to an comparable finish to an original cap.
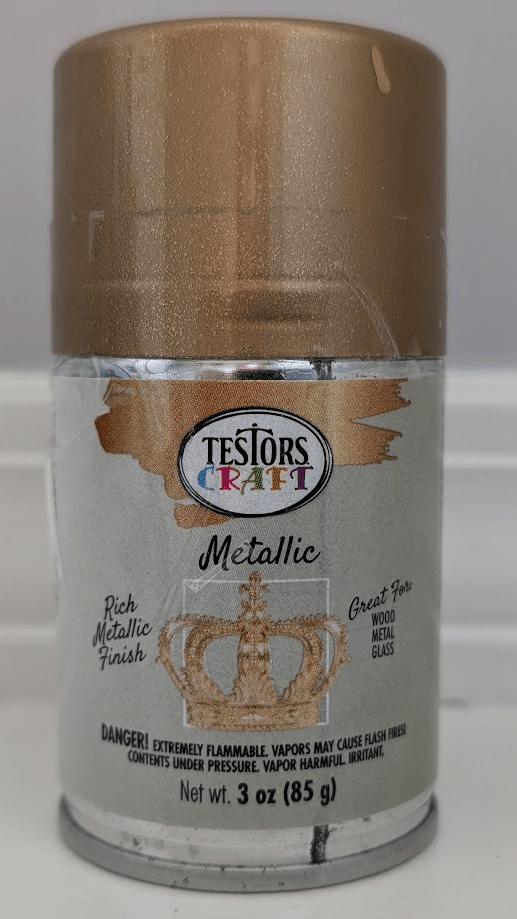
Using 200 grit sandpaper should get it smooth enough to apply several light coats of Plastikote 467. Then use 400 grit sandpaper and wet sand it until it gets to the desired finish.
Testors craft metallic gold is a close finish to the original cap color if you use a flat clear coat after using the gold paint. Spaz Sticks Ultimate Mirror Chrome can be used for a silver finish as well.
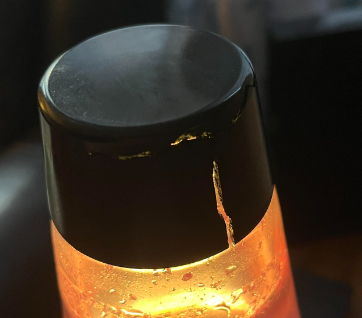
Crimp Caps
Crimp caps are the most frustrating to deal with, but with some patience they can be removed and reused.
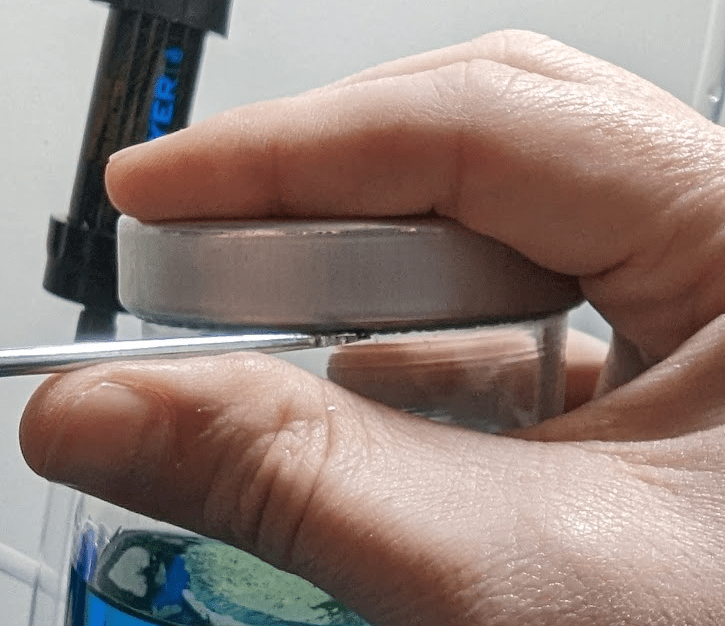
To remove crimp caps you need a very small screw driver to pry around the bottom lip until it starts to open up. Then a larger screw driver can be inserted to flatten out the crimped part of the cap.

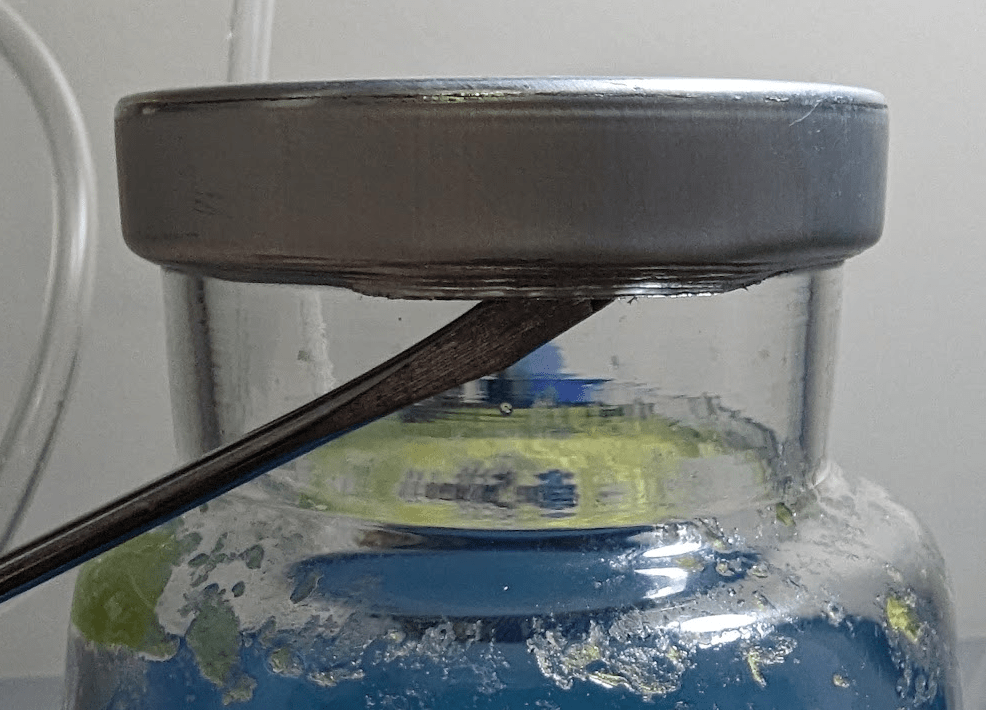
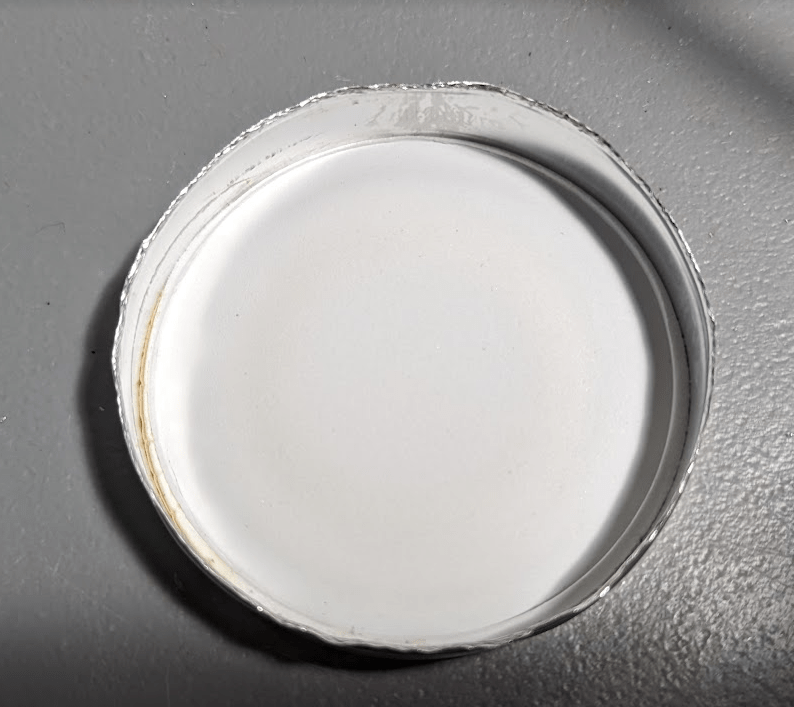
Slowly work around the cap until the entire cap is uncrimped. It should come off and look something like this. Some lamps also have a rubber plug under the crimp cap. Make sure to remove this gently because the older they are the easier they crack.
To put the cap back on, you will need to use a flat head screwdriver to press the cap back into its original shape. A pair of plyers can be used, but this will damage the cap. Apply downward pressure on the top of the cap and use your thumb to get some additional leverage and fold the edge of the cap back into its original position. The downward pressure is to ensure the rubber underneath the cap will provide some compression once you remove your hand to keep it sealed.
This is a slow process that require a lot of patience, but with enough care the cap can be reused a time or two. Be aware that each time you remove the cap it will lose some structural integrity because the bent metal edges will have less strength to hold the cap on.
