Shaken or Knocked over Lava Lamp
Repair by Cycling
Repair by Filtering
Filtering Results
Master Fluid Replacement
Introduction
A cloudy lava lamp is perhaps the most common issue that a lava lamp owner may encounter. Lava lamps can become cloudy due to various reasons, but the fundamental concepts remain the same. Emulsions form in the master fluid when the master fluid and the wax are mixed together, and particles get suspended in the master fluid. Usually, these particles are chemicals released by the wax, but sometimes a mixture can form from different ingredients reacting due to the age or storage conditions of the lamp. A lava lamp that has been shaken up during shipping or knocked over is more likely to be fixed than one left in a garage for thirty years, which may have undergone a chemical breakdown due to storage conditions. This article will discuss the first two scenarios as I have not found a way to save lamps in the third scenario.
Shaken or Knocked Over Lava Lamp
Firstly, it must be stated that if you have purchased a new Lava brand lava lamp from a company such as Spencer’s, Walmart, Amazon, or Lava itself, and it arrives cloudy, you deserve a replacement or a refund. These lamps may have been shaken during shipment and should be considered defective. Despite what some resellers may tell you, it is not acceptable, and you should not be required to try to fix it on your own. Modern lamps seldom clear on their own back to their factory state. Spencer’s even incorrectly states this in their FAQ.

The truth is that Lava branded lava lamps have had issues with clouding for the past 20+ years, ever since manufacturing was moved to China. It is their responsibility to produce a product that can survive shipping to their customers.
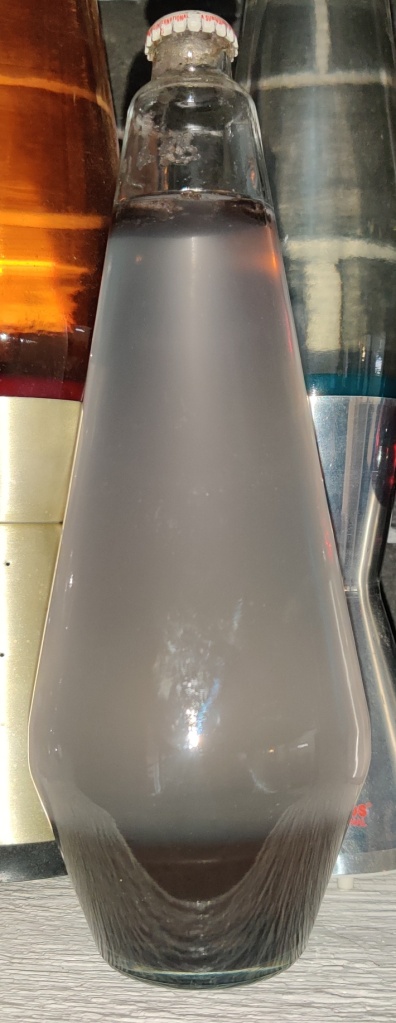
If you have just knocked over your lamp, the best course of action is to turn it off and leave it alone. Depending on how badly it is shaken up, you may need to employ more advanced fixes. You should leave it alone for at least 24 hours. After 24 hours have passed, evaluate its condition. Is there still a lot of debris floating around in it? If so, leave it for longer. If it just looks slightly cloudy, run it and observe how it flows. If it is still cloudy after several runs, it may require filtering to fix.
If it looks like this, it is probably beyond repair and will never look the same as it used to.

Repair by Cycling
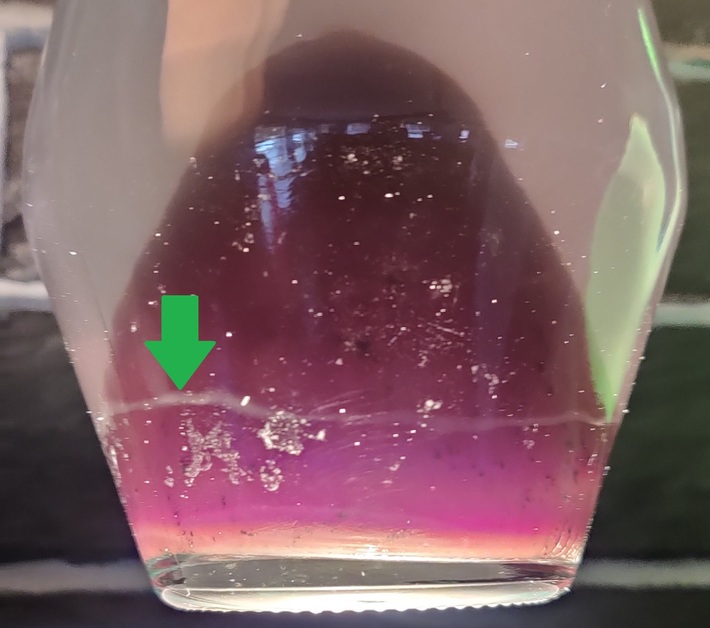
Most American-made Lava Lamps can be fixed simply by running the lamp. The lamp can be put on a timer to run for you. Set the timer to run the lamp for 6 hours on (or as long as it can be run without overheating) and 6 hours off. Run this cycle until the cloudiness goes away. You should notice a ring of white residue start to gather around the side of the wax at the bottom of the lamp while it is running. This residue should disappear when the lamp cools off. This residue is what is clouding the lamp.
Lava Lite lamps made after 2003 are significantly less likely to clear up using the cycling method. This is due to formulation changes when manufacturing was moved to China. This is another reason to return them immediately if purchased new rather than trying to fix them.
The lamp pictured to the right will clear up after being ran enough times.
If the cloudiness does not go away after a month, then there might be a more severe problem with the lamp. Some will clear up better if you let them sit in a cold place for a while. It depends on the reason the lamp is cloudy and the age of the lamp. If you own a second-hand lamp, it is hard to determine the best course of action.

Another way to clear up a lamp is to simply let it sit. This can take several months to years. Lamps that have shown no indication of clearing up will sometimes clear if left alone. However, typically what happens is white powder settles at the bottom and will cloud up the lamp again once the lamp starts flowing and the powder gets mixed up again.
If, after a few dozen runs, you see no improvement, you will want to look into filtering. It may be the only way to fully restore the clarity of the fluid.
Choosing the Right Filter
Before any filtering advice is given, something needs to be cleared up. In the past, MSR Miniworks ceramic filters were often recommended by community members, including myself. However, these filters have been discovered to cause damage to the surfactants in some lamps, depending on what formula they use. Additionally, they will damage all lamps if they are repeatedly filtered. This damage is caused by the inner carbon filter present in all MSR Miniworks ceramic filters.
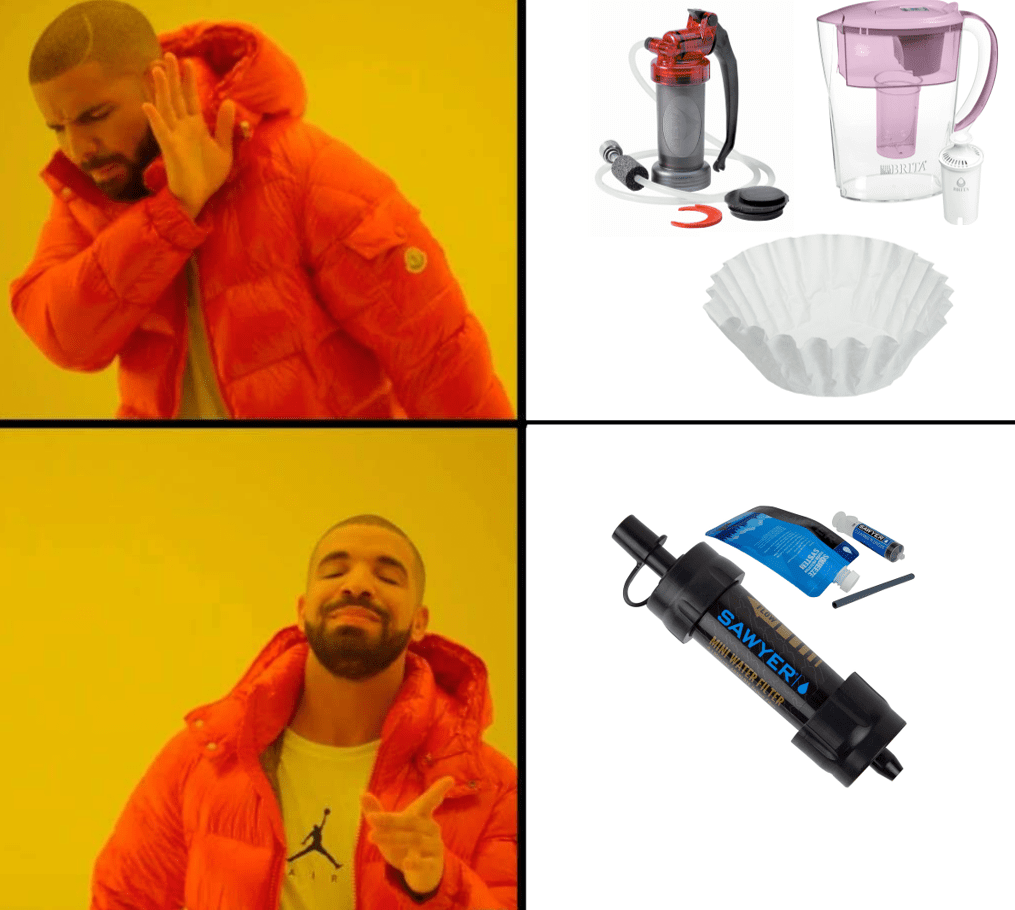
It is important to note that filter papers, including coffee filters or typical water filters like those offered by Brita, cannot be used. Not only do they fail to filter to the same extent as a hollow tube membrane or ceramic filter, but Brita filters also contain carbon, which can damage the surfactants.
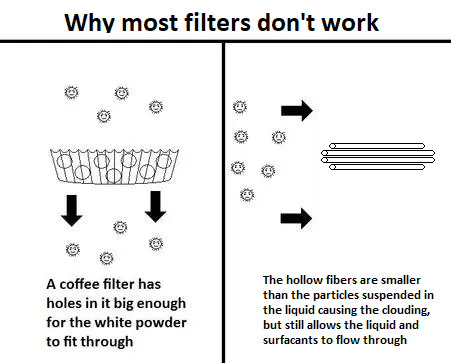
Filters used for removing are particles the size of bacteria are required because they are able to strain out the very small particles that cause clouding in your lava lamp. These particles are very small which means typical filters are not sufficient.
The recommended filter to use is a Hollow Fiber Membrane filter. This type of filter uses hollow fibers and, most importantly, contains no carbon, which means it does not damage the surfactants in the master fluid. These filters are sold by various manufacturers, but the brand that I have successfully used is Sawyer.
If you open one of these filters, you will see that it only contains hollow fibers and nothing else.

The one downside to these filters that I have noticed after using several of them is that they only survive a couple of filtering sessions before they clog up. I have tried running hot liquid in them in reverse to clear them up with limited success.
Filtering Preparations
To avoid clouding during filtering and wax streaks on the glass as you empty the globe, allow the lava lamp to cool down to room temperature before filtering. To solidify the wax further, place the globe in the refrigerator. This can be useful for softer waxes like in the case of 1960’s era lamps and most Mathmos lamps.
Before filtering, prepare a clean spare container to hold all the fluid from the lamp. Use a hollow fiber membrane filter that can be attached to any standard disposable plastic bottle. Make sure to clean the filter thoroughly with rubbing alcohol to prevent transferring bacteria or causing mold growth inside the lamp. Additionally, ensure that everything you work with is clean and has not been sitting stagnant with water inside it. If there is white sediment under the wax, stir it up to suspend it in the master fluid and ensure all of it is removed.
Remove the cap on the lamp and pour the fluid slowly into the container. Refer to this guide for help with removing and replacing the lava lamp cap. After removing the fluid, refill the lamp with water, swirl it gently, and pour it out to remove any remaining sediment that may be stuck to the wax. Repeat this process until the water stays clear.
Filtering
To begin filtering, attach the filter to the bottle and put the tip of the filter inside the opening of the lava lamp. Squeeze the filter until all the fluid has passed through it. If too many bubbles form, pause for a while. The goal is to reclaim as much fluid as possible. You may lose some fluid in the process, but it can usually be topped up with distilled water.
If the filter clogs, clean it out by running clean liquid through it in reverse.
Pretend this woman’s head is a lava lamp and you will get the idea.

There are other methods that work better for larger filtering jobs. For example, a primer bulb can be used in place of a bottle, and you can pump the bulb to move the fluid. Just make sure to put it inline before the filter. This is what I’d recommend if you are going to filter things such as a grande or have several lamps to filter.

Post-filtering
After the bubbles settle down, run the lamp for a full cycle. If the lamp is low on fluid, you can refill up to 1/2″ with distilled water. If you have fluid from another lamp of the same make (e.g., USA to USA, China to China), you can use much more to top the lamp. Filtering should not remove more than 1/2″ of fluid, so if you’re missing more fluid, it’s probably still in your filter. Keep in mind that if you’re using distilled water, you may be altering the density of your lamp, which will change the way it flows. Once you’re sure your lamp is flowing properly and has the correct fluid level, you can reseal the lamp. Make sure not to overfill the lamp, as doing so can cause the cap to pop off or the glass to crack.
You do not need to reseal the lamp when it is hot. This is another widespread incorrect practice. Doing so increases the chance that you will be unable to identify a poorly sealed lamp. This is especially important when dealing with glitter lamps because their contents can be especially volatile and can evaporate if not sealed correctly.
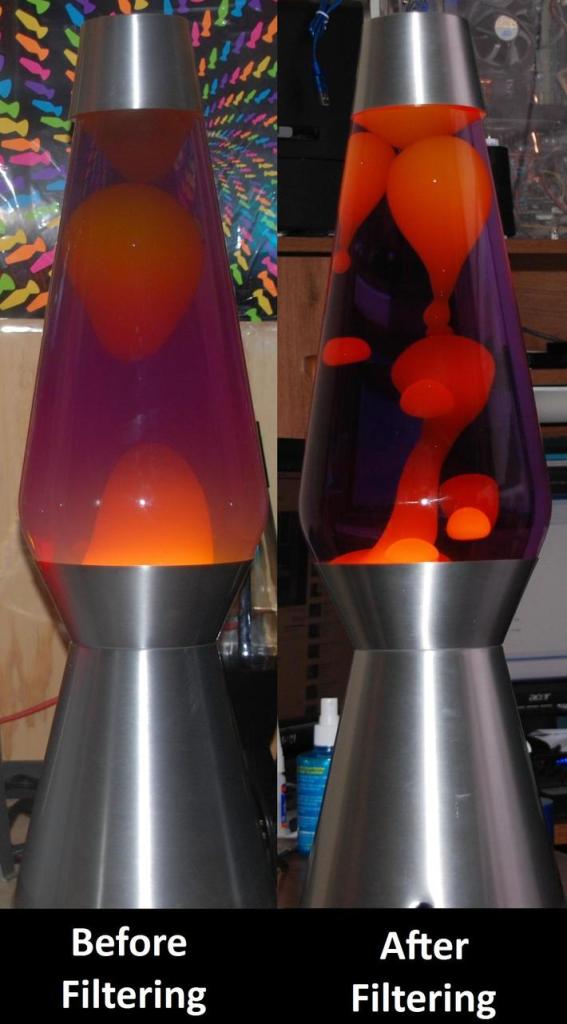
Filtering Results
The lamp below was filtered with a hollow fiber membrane filter. After several runs it still does not exhibit any signs of damage.

This lamp was so cloudy the wax couldn’t even be seen. The Sawyer filter was used on this lamp.

This lamp was filtered with an MSR Miniworks filter. It worked, but that is not always the case.

This Clearview was filtered 3 times by the sawyer fiber membrane filter and still flows great.
Master Fluid Replacement
If all else fails there are also options out there to completely change out your master fluid. This is a great option if filtering fails for whatever reason or you just don’t want to go through the hassle of trying to fix it. Just be aware the flow won’t be the same as it used to be, but it opens you up to many options for customization through colors of your choice that you can change at any time. Ozone Gifts is also working on new formulations that may one day even offer flow superior to modern day lamps!
There is no need to rewrite a how-to on using their OneShot product. A couple of excellent high production value videos already exist that can walk you through everything you need to know. When you are ready to buy a refill kit you can find them here. Ozonegifts.com
Mixing the master fluid batch.
How to do the refill.
